

There’s nothing quite as satisfying as cracking open a perfectly hard-boiled egg-its tender white encasing a rich, creamy yolk that’s vibrant and inviting. Yet, all too often, this simple pleasure is marred by an unappetizing gray ring that mars the yolk’s sunny glow. Fear not, egg enthusiasts! Say goodbye to those pesky gray halos and hello to flawlessly cooked eggs every time. In this article, we’ll explore the science behind that notorious discoloration and share foolproof techniques to achieve perfectly hard-boiled eggs that are as beautiful as they are delicious. Get ready to elevate your egg game and bring your breakfast-and every dish that calls for hard-boiled eggs-to a whole new level of perfection.
Perfectly hard-boiled eggs are a timeless kitchen staple, cherished for their versatility and nutritional value. Yet, nothing dims their appeal quite like the dreaded gray yolk, a sulfurous hue that signals overcooking and less-than-ideal texture. Understanding the chemistry behind gray yolks is key to preventing this common issue, making every egg you crack open a bright, sunny burst of golden goodness.
Understanding the Chemistry Behind Gray Yolks and How to Prevent Them
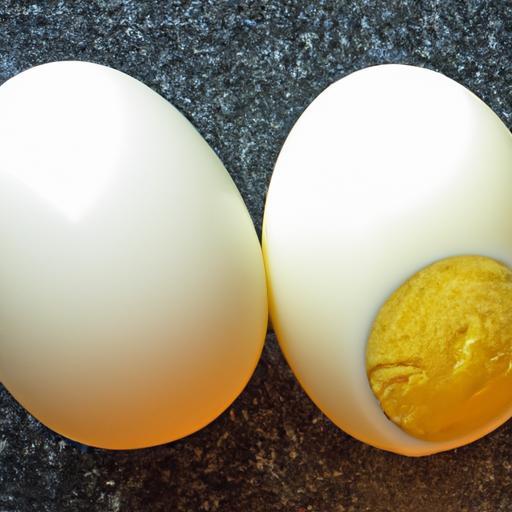
When eggs are cooked too long or at excessively high temperatures, a chemical reaction occurs between the iron in the yolk and the hydrogen sulfide in the white. This forms ferrous sulfide, which creates the characteristic gray-green ring around the yolk. While harmless, this ring is unappealing and often chalky in texture. By controlling cooking time and temperature, you can effectively stop this reaction in its tracks. Using gentle heat and precise timing means you’ll unlock that delicious creamy texture and preserve the radiant yellow hue that makes hard-boiled eggs a visual and flavorful delight.
Choosing the Right Cooking Method for Flawless Hard-Boiled Eggs
There are several methods to boil eggs, but selecting the right one greatly influences the outcome. Many home cooks swear by the classic boiling method-placing eggs in cold water, bringing it to a gentle boil, and then simmering. However, steaming eggs has gained popularity due to even heat distribution that reduces cracking and prevents overcooking. Another favored approach is using a sous-vide immersion circulator, allowing eggs to cook at low, controlled temperatures for unparalleled texture precision. Whichever method you choose, consistency is your best friend for perfectly cooked eggs every time.
Timing and Temperature Tips for a Bright Yellow Yolk Every Time
Timing is everything in the art of perfectly hard-boiled eggs. Generally, starting eggs in cold water and bringing them gently up to a boil before simmering for 9 to 12 minutes results in yolks that are thoroughly cooked yet tender. Avoid boiling eggs vigorously as this leads to rubbery whites and gray yolks. When using steaming, 11 to 13 minutes at full steam usually hits the mark. Immediate cooling in an ice bath is vital to halt cooking instantly, locking in that bright yellow color and creamy consistency inside.
Post-Cooking Techniques to Achieve the Perfect Texture and Appearance
Once cooked, eggs should be plunged into an ice bath to chill for at least 5 minutes. This not only ceases the cooking process but also firms the whites, making peeling easier and cleaner. For an aesthetically pleasing presentation, gently crack and roll the eggs on a hard surface to loosen the shell, then peel under running water to remove fragile membrane bits. To enhance texture, serve eggs chilled or bring them to room temperature before enjoying. Lightly sprinkling with a pinch of flaky sea salt or fresh herbs adds the perfect finishing touch.
Prep and Cook Time
- Preparation: 5 minutes
- Cooking: 10-12 minutes
- Cooling: 5 minutes
- Total Time: 20-22 minutes
Yield
Serves 4 (2 eggs per person)
Difficulty Level
Easy
Ingredients
- 6 large eggs, preferably farm-fresh or organic for best flavor
- Cold water for boiling and ice bath
- Ice cubes for rapid cooling
- Optional: Flaky sea salt and fresh herbs (chives, parsley) for garnish
Instructions
- Place the eggs in a single layer at the bottom of a saucepan and cover with cold water by about 1 inch.
- Heat the water over medium heat until it just reaches a gentle boil-tiny bubbles forming around the edges.
- Reduce heat to low and simmer for 9 to 12 minutes, depending on desired yolk firmness. For creamy yolks, aim closer to 9 minutes.
- Prepare an ice bath by filling a large bowl with cold water and ice cubes.
- Immediately transfer eggs with a slotted spoon to the ice bath for 5 minutes to stop cooking and facilitate peeling.
- Gently tap and roll the eggs on a hard surface to crack shells, then peel under running water for clean removal.
- Dry and serve chilled or room temperature, sprinkling with flaky sea salt and fresh herbs as desired.
Chef’s Notes
- Use eggs that are a few days old to peel more easily-very fresh eggs tend to cling to the shell membranes.
- For a hands-off approach, try steaming eggs for 12 minutes, then cool immediately; it reduces cracking and yields consistent results.
- If yolks show any gray-green tinges, reduce cooking time by 1-2 minutes or ensure fast cooling with ample ice water.
- Hard-boiled eggs keep well for up to one week in the refrigerator, unpeeled for best freshness.
Serving Suggestions
Perfectly hard-boiled eggs shine as a quick protein-rich snack, a crisp salad topping, or sliced on crispy avocado toast. For a refined presentation, halve the eggs and arrange on a platter, garnish with smoked paprika and finely chopped herbs. Pair with toasted whole grain bread and ripe tomatoes for a light brunch. Their naturally vibrant yellow yolks make for visually stunning deviled eggs or picnic spreads, promising a delicious bite in every slice.
| Nutritional Info (per 1 egg) | Calories | Protein | Carbohydrates | Fat |
|---|---|---|---|---|
| Hard-Boiled Egg | 78 | 6.3g | 0.6g | 5.3g |
Discover more tips on peeling eggs effortlessly and consult USDA Food Safety for Egg Handling to keep your kitchen safe and your eggs perfect.

Q&A
Q: Why do hard-boiled eggs sometimes get that unappetizing gray ring around the yolk?
A: That gray-green layer appears when eggs are overcooked or cooked at too high a temperature. It’s a chemical reaction between sulfur in the egg white and iron in the yolk, creating iron sulfide. While it’s harmless, it can give the yolk a chalky texture and metallic taste.
Q: How can I achieve perfectly hard-boiled eggs with bright yellow yolks every time?
A: The secret lies in precise timing and temperature control. Start with eggs in cold water, bring it gently to a boil, then immediately turn off the heat and cover the pot. Let the eggs sit in the hot water for about 9-12 minutes, depending on size. This gentle cooking prevents overcooking and keeps the yolks vibrant.
Q: Does the freshness of the eggs affect how well they boil?
A: Absolutely! Fresh eggs are harder to peel but offer creamier yolks. Slightly older eggs peel easier but may not have the same vibrant texture. Choosing eggs about a week old often hits the perfect balance for boiling and peeling.
Q: What’s the best way to cool boiled eggs so they don’t continue cooking?
A: Plunge your eggs immediately into an ice water bath right after cooking. This shock stops the cooking process, preserving the tender, bright yolks and making peeling a breeze.
Q: Can altitude affect how I should boil my eggs?
A: At higher altitudes, water boils at a lower temperature, which can affect cooking times. You may need to increase the resting time in hot water slightly to ensure perfectly set yolks without overcooking.
Q: Is it better to boil eggs with the shell on or off?
A: Boil eggs with the shells intact to protect them from water and help maintain their shape. Removing the shell before boiling can cause uneven cooking and an unpleasant texture.
Q: How do you store hard-boiled eggs to maintain their quality and color?
A: Store eggs in the refrigerator, ideally with the shells on to prevent drying out. Peeled eggs should be eaten within a couple of days to enjoy the best flavor and texture without discoloration.
Q: Can I use any cooking vessel or does the type of pan matter?
A: A heavy-bottomed saucepan is best for even heat distribution and preventing hot spots that can cause cooking inconsistencies. This results in evenly cooked yolks and whites throughout.
Mastering the art of hard-boiled eggs is simpler than you might think-just a splash of patience, the right technique, and soon you’ll bid farewell to gray yolks forever!
In Summary
And there you have it-your foolproof roadmap to perfectly hard-boiled eggs, where vibrant, golden yolks steal the show and that dreaded gray ring becomes nothing but a distant memory. With these simple techniques in your kitchen arsenal, each egg emerges tenderly cooked, delightfully smooth, and ready to elevate any dish-from salads to snacks. So next time you boil a batch, remember: precision and patience are your best friends. Say goodbye to the gray, and hello to brilliance in every bite!