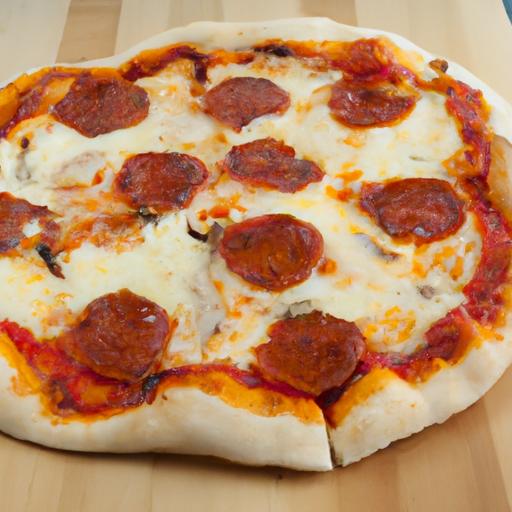

There’s an undeniable magic in a perfect pizza crust – crispy on the outside, tender and chewy within, effortlessly holding a symphony of flavors in every bite. But mastering the art of foolproof all-purpose pizza dough is where the kitchen alchemy truly begins. Whether you’re a seasoned home cook or a curious newcomer, this foundational skill transforms pizza-making from a guessing game into a confident craft. In this article, we’ll unravel the secrets behind creating a versatile dough that adapts beautifully to any topping, baking method, or occasion, ensuring your homemade pizzas rise to every delicious challenge. Get ready to roll up your sleeves and unlock the timeless joy of dough that promises consistency, flavor, and endless creativity.
Master the Art of Foolproof All-Purpose Pizza Dough
Master the art of foolproof all-purpose pizza dough with a deep dive into the science that transforms humble ingredients into a golden, chewy crust that’s crisp on the edges and tender inside. Whether you’re a seasoned pizzaiolo or a weekend baker, understanding the craft behind every step unlocks endless pizza possibilities and consistent success.
Prep and Cook Time
- Preparation: 20 minutes
- Proofing: 1 to 1.5 hours (plus optional overnight retarding)
- Cooking: 10-15 minutes
- Total Time: Approximately 1 hour 45 minutes to 2 hours
Yield
Enough dough for 2 medium-sized 12-inch pizzas (serves 4).
Difficulty Level
Easy to Medium: Perfect for beginners eager to learn reliable dough techniques, with tips to elevate skill as you go.
Ingredients
- 3 ½ cups all-purpose flour, sifted (approx. 450g)
- 1 ¼ cups warm water (about 110°F / 43°C)
- 2 tsp active dry yeast
- 2 tbsp olive oil, plus extra for coating
- 1 tsp fine sea salt
- 1 tsp granulated sugar
The Science Behind Perfect Pizza Dough Texture
The magic begins by choosing the right flour. All-purpose flour hits the sweet spot with its moderate protein content (usually 10-12%), which allows enough gluten development for that signature elasticity without toughness. Gluten strands stretch and trap CO2 bubbles during fermentation, creating light air pockets that puff beautifully in the oven. Water temperature is crucial to activate the yeast gently. Using warm water-around 110°F-ensures robust yeast fermentation without killing it. The addition of olive oil tenderizes the dough by coating some of the gluten strands, yielding a crust that’s tender yet crisp. Salt not only enhances flavor but also strengthens gluten structure by tightening the protein network. Finally, sugar serves as yeast’s favorite fuel, accelerating proofing and deepening crust color through caramelization during baking.
Choosing the Right Flour and Ingredients for Maximum Flavor
While all-purpose flour provides a reliable baseline, you can experiment by blending in small portions of bread flour (with a higher gluten content) for chewier crusts or whole wheat for a nuttier twist. Make sure to measure your flour by weight to keep hydration consistent, as this is key for replicable texture. Use good-quality olive oil for a subtle fruity complexity, and opt for fine sea salt to blend uniformly. Yeast quality matters-fresh, active dry yeast yields the best rise. Remember, using cold water and longer proofing times (like overnight in the fridge) develops more complex flavors through slow fermentation, enhancing the dough’s aromatic notes.
Step-by-Step Techniques for Kneading and Proofing Mastery
- Activate Yeast: In a small bowl, combine warm water, sugar, and yeast. Let it sit for 5-10 minutes until frothy, signaling active yeast.
- Mingle Dry Ingredients: In a large bowl, whisk flour and salt until fully combined.
- Mix Dough: Make a well in the flour mixture and pour in the yeast mixture along with olive oil. Stir gently with a wooden spoon or dough hook until it pulls away from the sides.
- Knead: Transfer dough to a lightly floured surface. Knead using the heel of your hands, folding and pressing for about 8-10 minutes. Look for a smooth, slightly tacky texture that springs back when poked.
- First Rise (Bulk Fermentation): Lightly oil a large bowl and place dough inside, turning to coat with oil. Cover with a damp towel or plastic wrap and let rise at room temperature for 1 to 1.5 hours, until doubled in size.
- Shape and Rest: Punch down dough gently to release gas. Divide as needed and let the dough balls rest, covered, for 20 minutes before stretching into pizza bases.
Troubleshooting Common Dough Issues for Consistent Results
- Dough Too Sticky: It’s better to be slightly sticky than too dry. Dust hands and work surface lightly, adding flour sparingly to avoid a dense crust.
- Dough Not Rising: Check yeast freshness and water temperature. Yeast needs warmth and sugar to activate; colder or very hot water will inhibit fermentation.
- Dough Too Tough or Dense: Over-kneading or too much flour can cause that. Knead just until smooth and elastic. Also, ensure sufficient proofing time for gas bubbles to develop.
- Baking Results in Hard Crust: Make sure your oven is preheated to a high temperature (475-500°F). Use a pizza stone or steel if possible for rapid, intense heat from below.
Instructions
- Preheat your oven to 475°F (246°C), placing a pizza stone or inverted baking sheet inside to heat.
- Prepare dough according to steps above and gently stretch into a 12-inch circle on a floured surface, leaving a slightly thicker edge for the crust.
- Transfer dough to parchment paper or a pizza peel dusted with semolina to prevent sticking.
- Add toppings sparingly-too heavy and the dough won’t crisp.
- Bake on the hot stone or sheet for 10-15 minutes until the crust is deeply golden and toppings are bubbly.
- Remove from oven, garnish as desired, slice, and serve immediately!
Chef’s Notes and Tips for Success
- For deeper flavor, refrigerate dough overnight after the first rise to slow fermentation.
- If short on time, proof dough in a warm, draft-free spot to speed activation, but flavor strengthening will be less pronounced.
- Use a kitchen scale for precise ingredient measurements-it’s a key to foolproof dough.
- Substitute part of the water with chilled sparkling water to introduce extra lightness and crispness.
- Keep dough covered during resting to prevent a dry crust that can affect stretchability.
- Experiment with herbs or garlic-infused olive oil brushed on the crust for an aromatic upgrade.
Serving Suggestions
Serve your pizza fresh from the oven with a drizzle of extra virgin olive oil and a handful of torn fresh basil leaves for bright, herbal contrast. A sprinkle of flaky sea salt right before serving amplifies flavor layers. Pair with a simple mixed greens salad dressed in lemon vinaigrette to balance rich cheese and toppings. For a festive touch, add red pepper flakes or a dusting of grated aged Parmesan. This dough’s subtle flavor and perfect texture beautifully support everything from classic Margherita to roasted vegetable masterpieces.
| Nutrient | Per Serving (1/2 dough) |
|---|---|
| Calories | 450 kcal |
| Protein | 12 g |
| Carbohydrates | 88 g |
| Fat | 7 g |

Enhance your pizza craft even further with our Ultimate Pizza Sauce Guide. For more in-depth knowledge on yeast science, visit King Arthur Baking’s definitive yeast guide.
Q&A
Q&A: Master the Art of Foolproof All-Purpose Pizza Dough
Q1: What makes a pizza dough truly all-purpose?
A1: An all-purpose pizza dough strikes the perfect balance between elasticity and crispiness, making it versatile enough for thin crust, deep dish, or even calzones. It’s adaptable to various toppings and baking methods, producing consistent results every time.
Q2: Which flour type is best for crafting pizza dough that’s both chewy and tender?
A2: High-protein bread flour is often the star player here, as its gluten content helps develop that desirable chew. However, a blend of bread flour and all-purpose flour can soften the texture slightly, offering flexibility depending on your preferred crust style.
Q3: How important is the hydration level in pizza dough?
A3: Hydration-the ratio of water to flour-affects the dough’s texture and workability. Higher hydration yields an airy, open crumb and slightly crisp edges, while lower hydration produces a denser, chewier crust. Striking the right balance based on your baking environment and tools is key to foolproof dough.
Q4: Can I prepare pizza dough without specialized equipment?
A4: Absolutely! While a stand mixer or dough hook can speed things up, mixing and kneading by hand works just as well. The tactile experience can actually help you better judge dough readiness – look for a smooth, elastic surface that springs back when pressed.
Q5: What’s the secret to consistent yeast activation?
A5: Fresh, warm water (ideally around 100°F/38°C), a pinch of sugar to feed the yeast, and proper timing are essential. Ensure your yeast is fresh and avoid water that’s too hot or cold-it can inhibit or kill the yeast, derailing your dough’s rise.
Q6: How long should the dough rest for optimal flavor and texture?
A6: Patience is a virtue here! A slow, cold fermentation in the refrigerator for 24 to 72 hours boosts flavor complexity and improves dough structure. If you’re short on time, a warm rise of 1 to 2 hours is sufficient but won’t develop the same depth of taste.
Q7: What’s the best method to roll or stretch pizza dough?
A7: Using your hands to gently stretch the dough preserves air bubbles, leading to a lighter crust. If you prefer rolling, do so lightly and avoid over-flattening. The goal is a thin, even base that doesn’t sacrifice the dough’s airy integrity.
Q8: How can I customize my dough without compromising its foolproof nature?
A8: Tweaking hydration slightly, swapping in whole wheat or gluten-free blends, or adding herbs and spices can personalize your crust. Keep alterations moderate, maintain proper kneading and fermentation techniques, and you’ll still enjoy reliable results.
Q9: Is it possible to freeze all-purpose pizza dough?
A9: Yes! Portion your dough into individual balls, lightly coat with oil, and freeze in airtight containers. Thaw in the refrigerator overnight before use. This convenience level makes spontaneous pizza nights a breeze while keeping the dough’s integrity intact.
Q10: What common mistakes should be avoided when making pizza dough?
A10: Over-kneading can make dough tough; under-kneading leaves it sticky and unstructured. Using water that’s too hot or too cold can kill or inhibit yeast activity. Skipping the resting phase often results in flat, flavorless crusts. Lastly, rushing the stretching process can pop precious air bubbles, diminishing the final texture.
Mastering pizza dough is about understanding your ingredients, trusting the process, and practicing a little patience. With these tips, your kitchen becomes a pizzeria capable of crafting flawless crusts every time!
To Conclude
Whether you’re a seasoned chef or a kitchen novice, mastering the art of foolproof all-purpose pizza dough is your ticket to endless culinary creativity. With this reliable base at your fingertips, the possibilities stretch far beyond traditional pies-think crispy calzones, golden focaccias, or even rustic breadsticks. So roll up those sleeves, embrace the dough’s delightful elasticity, and let your imagination rise alongside it. Because once you’ve nailed this essential skill, every homemade pizza night becomes a celebration of flavor, texture, and the joy of crafting something truly your own. Happy baking-and even happier eating!