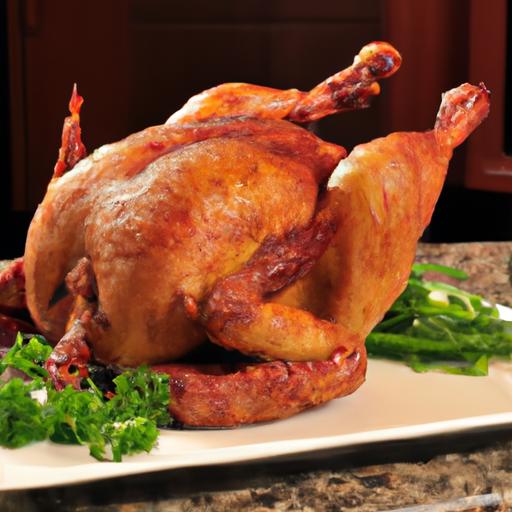

There’s something undeniably satisfying about transforming a whole chicken into perfectly portioned pieces-each one juicy, flavorful, and ready to shine in your favorite recipe. But cutting a chicken into 8 pieces isn’t just about brute force or guesswork; it’s an art form that balances precision, technique, and a touch of culinary finesse. Whether you’re a novice looking to build confidence or a seasoned home cook aiming to sharpen your skills, mastering this fundamental kitchen technique will elevate your cooking game and deepen your connection to the ingredients. Join us as we break down the process step-by-step, revealing tips and tricks to carve your way to juicy, tender chicken perfection every time.
Choosing the Perfect Chicken and Essential Tools for the Job
Master the Art: How to Cut a Whole Chicken Into 8 Pieces begins with selecting the freshest, highest-quality bird you can find. Opt for a whole chicken that feels firm and plump, with smooth, pale skin free from blemishes or bruising. A chicken weighing between 3.5 to 4.5 pounds is ideal for balanced pieces and ease when breaking it down at home. Organic or pasture-raised chickens enhance flavor and texture, making your efforts worth every cut.
Equally important are the right tools. A sharp chef’s knife or boning knife with a sturdy, narrow blade will give you precision and control, essential for clean joints and maximizing yield. A pair of quality poultry shears can help with tougher sections like backbone removal. A sturdy cutting board, ideally wooden or plastic with a non-slip base, ensures stability and safety. Invest in a kitchen towel to grip slippery chicken skin and keep your knives dry for safer handling.
Breaking Down the Chicken Step by Step with Expert Techniques
Start by placing your chicken breast-side up. To separate the legs, gently pull each one away from the body until the hip joint “pops.” Slide your knife through this natural seam without forcing-feeling for the joint is key to avoiding wasted meat. When removing the wings, locate the fold between the wing and the breast, again slicing through the joint rather than the bone.
For the breast, make a long, clean cut down the center of the chicken to create two equal halves. Then, slice each breast half into two pieces to finish splitting the bird into 8 portions: two drumsticks, two thighs, two wings, and two breast pieces. Use controlled, decisive movements; practice will build your confidence and precision.
Tips for Precise Cuts to Maximize Yield and Presentation
- Follow the joints: Rather than hacking through bone, carefully locate and slice through the joints for tender, intact pieces.
- Keep your knife sharp: A dull blade tears meat and skin, compromising appearance and yield.
- Use your fingers to feel: Gently separating flesh helps you see where natural cuts lie, especially around tricky areas like the wings and thighs.
- Work on a clean, stable surface: Slippery boards or wet skin can result in uneven cuts and accidents.
- Take your time: Precision beats speed-especially when learning these techniques.
Storing and Cooking Recommendations for Each Chicken Piece
Each chicken cut offers unique cooking opportunities. Drumsticks are perfect for baking or grilling, benefiting from longer, slower cooking to develop rich flavor and tender flesh. Thighs hold moisture well and are superb for braising or frying, delivering juicy, savory bites. Wings shine when roasted crisp or tossed in bold sauces, ideal for sharing or appetizers. Breast pieces are versatile and cook quickly; grilling, sautéing, or pan-searing preserves their tender texture and subtle sweetness.
For storing, keep raw pieces in their original packaging in the coldest part of your fridge and use within 1-2 days. If freezing, wrap tightly in plastic wrap and foil or place in vacuum-sealed bags to prevent freezer burn, labeling with the date for up to 6 months. Thaw in the fridge overnight before cooking for best results.
Experiment with seasoning or marinades tailored to each cut’s cooking style – herb-based rubs on thighs and drumsticks, spicy glazes for wings, or a simple salt and pepper rub for succulent breast pieces. Mastering these foundational cuts elevates every chicken dish, making home cooking both accessible and impressive.

For more detailed cooking techniques, check out our comprehensive Guide to Cooking Chicken and for anatomy tips, visit the USDA’s official poultry resources at USDA FSIS Poultry Safety.
Q&A
Q&A: Master the Art – How to Cut a Whole Chicken Into 8 Pieces
Q1: Why should I learn to cut a whole chicken into 8 pieces instead of buying pre-cut parts?
A1: Cutting your own chicken gives you control over freshness, portion sizes, and quality. It’s often more economical and allows you to savor the satisfaction of kitchen mastery. Plus, you can customize cuts to suit your recipes perfectly!
Q2: What tools do I need to get started?
A2: A sharp chef’s knife or boning knife is essential, along with a sturdy cutting board. Having a pair of kitchen shears can also be helpful for snipping through joints. Make sure your tools are sharp and clean for smooth, safe cuts.
Q3: How do I prepare the chicken before cutting?
A3: Begin by patting the chicken dry with paper towels. Place it breast side up on your cutting board to have a clear view of the natural folds and joints, which will guide your slicing. Removing any excess fat or loose skin can make the process cleaner.
Q4: What’s the step-by-step process to cut a whole chicken into 8 pieces?
A4: Here’s a creative breakdown:
- Remove the wings by slicing through the joint where they connect to the breast.
- Cut off the drumsticks by bending the leg and cutting at the joint.
- Separate the drumstick from the thigh by slicing through the joint.
- Remove the thighs from the body by cutting along the backbone side.
- Halve the breast by slicing down the centerbone.
- You’ll end up with two halves of the breast, two thighs, two drumsticks, and two wings-eight pieces in total!
Q5: How can I tell if I’m cutting through a joint vs. bone?
A5: Joints offer resistance but can be sliced through cleanly with a well-placed cut, often feeling like you’re slicing through soft tissue. If you hit hard resistance, gently reposition your knife-the joints are usually in indentations or natural bends, making cracking sounds when moved.
Q6: Is it safe to handle raw chicken this way?
A6: Absolutely, as long as you follow food safety practices. Wash your hands, utensils, and surfaces thoroughly before and after handling. Use separate boards for meat and vegetables to prevent cross-contamination.
Q7: Can this method be adapted for larger or smaller chickens?
A7: Definitely! The principles remain the same regardless of size. Smaller chickens might have more delicate joints, so adjust the pressure you apply and take your time with each cut.
Q8: What creative dishes can I make once I’ve cut the chicken into 8 pieces?
A8: Each cut lends itself to a world of culinary possibility! Roasted leg quarters, crispy pan-fried wings, braised thighs bursting with flavor, or quick sautéed breast halves-your homemade cuts unlock endless recipes that showcase your freshly prepared poultry.
Embrace the art of cutting chicken and turn a humble bird into an 8-piece culinary canvas!
In Retrospect
Mastering the art of cutting a whole chicken into eight perfect pieces is more than just a kitchen skill-it’s a rite of passage for any home cook eager to elevate their culinary confidence. With the right knife, a steady hand, and a bit of practice, you can transform a whole bird into neatly portioned cuts that roast evenly, fry beautifully, or simmer into your favorite stew. So next time you bring home a whole chicken, remember: you hold the power to carve it into a feast, piece by delicious piece. Embrace the process, and let every slice inspire your next homemade masterpiece.