

There’s something truly magical about a pie crust that shatters with a delicate crunch, revealing layers so tender and buttery they practically melt on your tongue. Achieving that flaky perfection isn’t just a happy accident, it’s an art and a science, a dance between cold butter and patient hands. Whether you’re a seasoned baker or a curious beginner, mastering the basics of an all-butter pie crust opens the door to endless delicious possibilities. In this article, we’ll unravel the secrets behind those irresistible golden layers, guiding you step-by-step to create a crust that’s as satisfying to make as it is to eat. Get ready to elevate your baking game, because flaky perfection is closer than you think.
Flaky Perfection: Mastering the All-Butter Pie Crust Basics
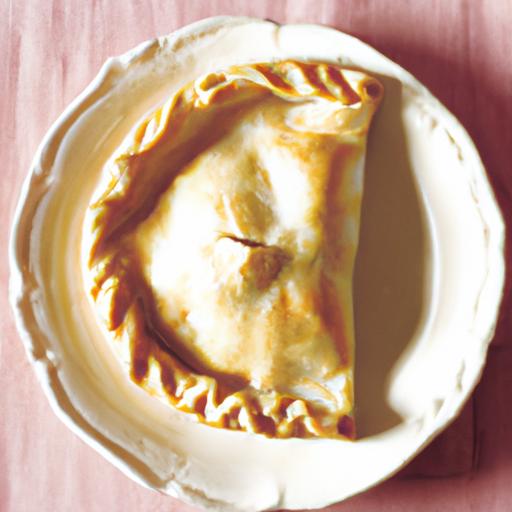
Flaky Perfection begins with understanding the magic that unfolds when simple ingredients, flour and butter, join forces in the perfect dance. The richness of all-butter crust, with its tender layers and delicate crunch, is a hallmark of classic baking that elevates both sweet and savory pies to an art form. Whether it’s a crisp apple tart or a velvety pumpkin pie, nailing this foundation transforms your baking into an irresistible experience.
Prep and Cook Time
- Preparation: 20 minutes
- Chilling: 1 hour minimum
- Baking: 15-20 minutes (blind baking) + additional filling bake time
Yield
One 9-inch pie crust, enough for a single deep-dish pie or two standard piesheets
Difficulty Level
Medium – Perfect for bakers ready to elevate their technique and enjoy truly flaky results
Ingredients
- 1 1/4 cups all-purpose flour, sifted
- 1/2 teaspoon fine sea salt
- 1/2 cup unsalted butter (1 stick), cold and cubed
- 3-4 tablespoons ice water, more if needed
Instructions
- Combine dry ingredients: In a large bowl, whisk together the flour and salt. This forms a balanced base for tender, flavorful crust layers.
- Cut in the butter: Add the cold, cubed butter to the flour mixture. Using a pastry blender or your fingertips, work the butter into the flour quickly, aiming for coarse pea-sized pieces scattered throughout. The key is to keep the butter cold so it steams during baking, creating that wonderful flakiness.
- Add ice water gradually: Drizzle 3 tablespoons of ice water one tablespoon at a time, gently mixing with a fork until the dough just begins to come together. Avoid overworking it; the dough should hold when squeezed but remain crumbly.
- Form and chill the dough: Gather the dough into a rough disc without kneading. Wrap tightly in plastic wrap and refrigerate for at least 1 hour. This chilling step relaxes gluten strands and keeps the butter firm, preventing toughness.
- Roll out the dough: Lightly flour a cool surface and roll the dough into a 12-inch circle about 1/8 inch thick. Rotate the dough occasionally to avoid sticking and use minimal flour to prevent dryness or tears. If cracks appear at the edges, gently press them back together with your fingers.
- Transfer and trim: Carefully lift the dough onto your pie plate using the rolling pin as a guide. Press down gently and trim any excess dough, leaving about a half-inch overhang. Fold under the edges and crimp decoratively.
- Blind baking preparation: Chill the prepared crust in the fridge for 15 minutes before blind baking to prevent shrinking. Line the crust with parchment paper or foil, then fill with pie weights or dried beans.
- Bake for a crisp finish: Bake at 375°F (190°C) for 15-20 minutes until the edges are golden. Remove weights and lining, then bake an additional 5 minutes if a fully golden bottom is desired. This step prevents sogginess and ensures a sturdy, flaky crust ready to hold your favorite filling.
Chef’s Notes: Tips for Success
- Butter temperature: Use cold, unsalted butter straight from the fridge. Soft or melted butter will ruin the layers.
- Water additions: Be conservative with ice water. Add gradually, just enough to bind the dough without making it sticky.
- Handling dough: Handle as little as possible to keep gluten tender.
- Makeahead: Dough can be wrapped and refrigerated for up to 2 days or frozen for a month; thaw before rolling.
- Pie weights alternatives: If you don’t have ceramic weights, clean dried beans or rice work perfectly well.
- Troubleshooting tears: Patch small tears with extra dough or water-dampened flour and patch material.
Serving Suggestions
Present your flaky all-butter crust with vibrant seasonal fruit fillings like spiced apple or tart cherry, topped with a dusting of powdered sugar or a dollop of freshly whipped cream. For savory pies, fill with roasted root vegetables and a sprinkle of fresh herbs. A garnish of fresh thyme or a light brush of melted butter on the edges adds a golden sheen and inviting aroma.
| Nutrient | Per Serving (1/8 pie) |
|---|---|
| Calories | 210 |
| Protein | 2g |
| Carbohydrates | 20g |
| Fat | 14g |
For further tips on exquisite pie crusts, explore our in-depth guide on Butter vs Shortening Pie Crusts. Enhance your baking knowledge with expert advice from King Arthur Baking’s Pie Crust Guide.

Q&A
Q&A: Flaky Perfection – Mastering the All-Butter Pie Crust Basics
Q1: Why choose an all-butter pie crust over other fats like shortening or lard?
A1: Butter imparts unrivaled flavor and a tender, flaky texture thanks to its water content and milk solids. Unlike neutral fats, butter’s rich, creamy taste elevates every bite, while its ability to create steam during baking forms flaky layers that melt in your mouth.
Q2: What’s the secret to achieving a perfectly flaky texture in an all-butter pie crust?
A2: The key lies in keeping your ingredients cold, handling the dough gently, and maintaining small pieces of butter throughout the dough. These butter pockets create steam as the crust bakes, forming those signature flaky layers. Avoid overworking the dough to prevent gluten development that leads to toughness.
Q3: How cold should the butter and water be when preparing the dough?
A3: Ice-cold is the magic word. Butter should be chilled until firm but still pliable think refrigerator-cold or even slightly cooler. The water added should be icy to keep the dough cold and prevent the butter from melting prematurely, ensuring flakiness.
Q4: Can I use a food processor to make the pie dough?
A4: Absolutely! A food processor is a great tool to quickly cut cold butter into flour without warming it up with your hands. Just pulse gently until the mixture resembles coarse crumbs with some pea-sized pieces of butter still visible. From there, sprinkle in ice water gradually to bring it together.
Q5: How do I know when the dough has been mixed enough?
A5: When the dough begins to clump and holds together after a few gentle presses, it’s ready. It should still feel a bit crumbly but stick together easily when pinched. Overmixing can toughen the crust, so it’s better to err on the side of less.
Q6: What’s the best way to roll out an all-butter dough without it sticking or tearing?
A6: Lightly flour your work surface and rolling pin, then roll from the center outward with even pressure. Rotate the dough a quarter turn frequently to maintain an even thickness and prevent sticking. If the butter softens too much or the dough starts tearing, pop it back into the fridge for 10-15 minutes.
Q7: Should I blind bake the all-butter pie crust?
A7: It depends on the recipe! Blind baking pre-baking the crust without filling, is ideal for custard pies, tarts, or any filling that doesn’t require baking. To prevent shrinkage or bubbling, prick the dough with a fork and use pie weights or dried beans on parchment paper. This helps maintain that perfect flaky structure and golden color.
Q8: How can I add a touch of extra flavor or color to the crust without compromising flakiness?
A8: Brush the surface with an egg wash (a beaten egg or egg yolk mixed with a bit of water or milk) before baking. This enhances browning and creates a shiny, golden finish. Adding a tablespoon of sugar to the dough can add a subtle sweetness and slight caramelization as it bakes.
Q9: What common pitfalls should I avoid when making an all-butter pie crust?
A9: The biggest mistakes are letting your butter get too warm, overworking the dough, and rolling too aggressively. Warm butter blends too thoroughly, losing its ability to create flaky pockets. Overworking develops gluten, making the crust tough. And rolling without rotating or chilling when needed can cause tearing or shrinking.
Q10: How far ahead can I make all-butter pie crust dough?
A10: You can prepare the dough up to two days in advance, wrapped tightly in plastic wrap and chilled. For longer storage, it freezes beautifully for up to 3 months. Thaw overnight in the refrigerator before rolling out to preserve texture and flavor.
Mastering an all-butter pie crust means embracing the beauty of simple ingredients and mindful technique cold, gentle, patient. Your reward? A flaky, buttery canvas ready to showcase your favorite fillings with undeniable perfection.
In Summary
As the last golden crumb falls away and your all-butter pie crust reveals its tender, flaky layers, you’ll know you’ve unlocked a timeless baking secret. Mastering this art isn’t just about following a recipe, it’s about understanding the delicate dance between butter, flour, and patience. With these basics under your belt, every pie you create will be a buttery masterpiece, crisp on the edge and tender in the center. So next time you roll up your sleeves, remember: flaky perfection is within your grasp, waiting to transform simple ingredients into a symphony of texture and flavor. Happy baking!